FIGHTING CHOOK NOVICE

After our little reminisce over the past 3 posts, (even though I could’ve gone on for a 4th!), it’s time to carry on with the present.

Just before we were asked to go over to the UK to present a talk on self-sufficiency, we had bought 4 chickens from our local market, we really wanted our own eggs again. Before we built ‘The Willows’ we had owned chickens so knew how to rear them, but after a year or so the fox came and took them. This was partly my fault because I didn’t make their run secure enough, but you live and learn and this time it was to be bigger and better and definitely more secure.

DSCF1799

The netting was pulled very tight and a batten was nailed to the bottom to stop anything from pulling at the netting, which comes out from the run by 8 inches to stop anything from digging under. The net was also dug into the ground.

DSCF2009

The netting comes out as far as my hand and then into the ground.

Now we were secure…….. I DON’T THINK SO !!

The very next day E was working in tunnel 1 when she heard such a commotion. The neighbour’s dog was in the run with one of the chickens in its jaws. The dog was talked to very nicely ( well, what do you really think we said to it?), but unfortunately the poor chook died the next day. We had only had them for 4 days! The dog had actually pulled the netting out of the ground, pulling the wooden battern with it. We couldn’t believe it.

Ok, so that was now a big wake up call for us, so 4 strands of barbed wire were placed all around the bottom of the run, pulled tight and spaced at 4 inch intervals. After a few days the dog had been back in the run again, luckily no more chooks were missing but all of their food had been eaten. Now what to do? We were due to go away in 2 days time and we were starting to panic. More barbed wire needed I think.

DSCF2012

I had to finish this on the morning of us leaving and now it was just up to chance, I’d done my best I hoped.

We arrived home after 1 week away to find just 2 chickens and a run full of broken eggs. We couldn’t believe it but this dog who isn’t a small animal, had managed to crawl through the barbed wire, leaving a lot of fur behind in the process. Our whole land is fenced with sheep netting and barbed wire to prevent animals straying onto the land and I was getting very ANGRY. It’s one thing to have a wild animal take your stock but not somebody elses so-called family pet! Anyway, after being home for about half an hour, E turned round and there was the missing chicken looking at her, so at least nothing had harmed her. After asking around we found out that these neighbours had in fact moved out leaving this poor dog to fend for its self! It was obviously very hungry which shouldn’t really have been our problem, but taking our chickens, their eggs and food then it became our problem. We contacted the animal rescue and it’s now safe and well, being fed and given the attention that it deserves.

DSCF1835

” What you lookin’ at? You don’t scare me dog!”

So this is where the novice part comes into things because at the end of the day that dog taught us a good lesson. One has to secure livestock far better than one imagines and that includes fencing our land better.

Until next time.


TEN YEARS TODAY

Well, here we are on the 3rd and final instalment of our little reminisce on how we started our journey to self-sufficiency and eco living. Over the past 2 parts we explained how we started with a 40 foot caravan and added a wooden extension onto it and installed water and electricity. But, there was still a lot more to do to make it comfortable and liveable. More

TEN YEARS AFTER Part 2

Hi, well here we are again with another little reminisce about how we started our journey towards  self sufficiency and eco living. The first part was all about getting the outer shell of the building up and weather proofing.

Once this was done, it was time to try and make it into a house before it could become a home. Basically first we needed running water instead of using buckets, and once there was a proper roof, it made things a lot easier to collect rain water that ran off and into a 1000 litre tank that was placed on blocks underneath the guttering. This gave us enough pressure to fill the toilet cistern and caravan sinks.

More

TEN YEARS AFTER

Apart from ‘Ten Years After ‘ being a favourite band of ours from the ’60’s and ’70’s, it’s also coming up to our 10th anniversary of owning our land here in Ireland, and leading us to try to set up, build and live a self-sustainable lifestyle on our own.

We didn’t actually do anything with the land for a couple of years after buying it because we weren’t really sure just what we wanted to do, but after a while everything started to come together, especially once we’d bought the 40ft mobile home, placed it on the land and stayed for a 2 week holiday in it. This was 8 years ago, a lot of hard work and some mind puzzling problems to overcome. More

HAPPY NEW YEAR

022

WISHING YOU ALL A VERY HAPPY NEW YEAR FROM ‘THE WILLOWS’ AND HERE’S TO 2014.

IT AIN’T HALF HOT MUM !

Welcome back once more to ‘The Willows’. We haven’t put a post out for a few weeks as we have been really busy trying to get all of our projects for this year finished before Christmas. Well we’ve managed it and we are very pleased about it all and have actually got about 5 posts to go out but we will split these up over the coming weeks.

The posts going out may be a bit topsy turvy and not in order, but I’m sure you’ll get the drift.

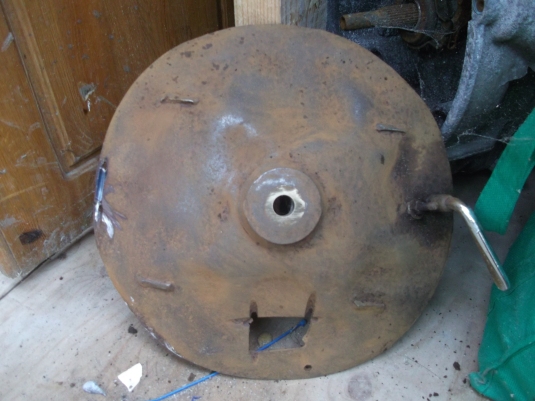
This post is about’ Percy the Pig’. I’ve just finished building a Pub/Gym but it’s started to get quite cold in there, well it is December after all, and I needed some heat  so that I can work out on my punch bag. I decided to make a stove out of an old rusty gas bottle.

046

This is just a rusty old gas bottle.

The top of the bottle is then cut off, I used an angle grinder as the metal is so hard, ( if you are going to make a stove yourself, please remember to remove the brass valve that the regulator attaches to as there will always be some liquid gas left in the bottle and we don’t want any explosions!)

044

I also wanted to make the stove out of as much recycled material as possible so I made the legs out of old leaf springs from a Hi-Lux truck. These were impossible to drill through so I had to angle grind these too so that I could put a nut and bolt through the whole lot to hold it all together. A hinge was attached for the door and the hole at the top at the back is for a flue pipe to be fitted.

045

The top of the bottle that was cut off will make the door. I hammered it flatter to make a better fit and cut a hole at the bottom to allow the fire to draw. The door handle is made from a rear wheel quick release nut from an old push bike.

052

After sanding it down a high temperature paint was applied and left to dry for 24 hours. You can see why we call it the pig, it has a face !

053

Here it is all in position. Unfortunately I had to buy the flue ( but everything else is recycled), and I had to shape the base of the flue to fit the curve of the bottle, and this was then attached to the bottle by using 2 brackets. I found some left over tiles to place the stove on to protect the floor in case any hot ash spilled out when opening the door.

060

We made a very small fire to ‘bed’ it in as the paint will have to harden further, but you can get some real heat out of them once cranked up !

Now, let’s see if my punch bag will get some more use, of course it will cos I love kicking the hell out of it !

Anyway, keep warm and enjoy.

Oh by the way, a new addition has moved in. A small white kitten turned up a few weeks ago in a very sorry state. She was skin and bone, her eyes were mattered up, and she was seriously malnourished, dehydrated and exhausted and could hardly walk. After some TLC and a dose of wormer she is now a truly different cat ! We have named her ‘Beryl the Feral’ and she now resides in the Pub/Gym alongside that new stove !! Welcome Beryl.

061

‘The Willows’

THE AUTUMN FEDGEROW UPDATE

Before I get started on this subject, I have to tell you what a very , very strange, weird and exciting week we’ve had here at ‘The Willows’. We have been contacted by a major, international media company, based in London, wanting to run a story about our lives, and our way of living, because we are completely off the grid, with our own alternative energy, water supply and almost all our own food ( we are still sorting out the last one !). I had a really nice, hour long telephone conversation, with a lovely lady, just talking about life at ‘The Willows’. After a few days she contacted us again and said that even though there’d been a very good response from newspapers and magazines, and even though we are both British citizens, the papers would prefer to have had  UK based people. So, oh well, we can only wait and see if the newspapers come to their senses ! But, at the end of the day, thank you so much to Hannah and the publishing company for recognising our little story and making us both feel so proud of the acknowledgement.

Anyway, onwards and upwards.

Now, the willow fedgerow is one of our constant and favourite blog stories for the simple fact that it was this subject that started us off on our blog journey, when a couple of our friends visited us and took some photos for their own blog. www.fromacountrycottage.wordpress.com  and they received a good response to it.

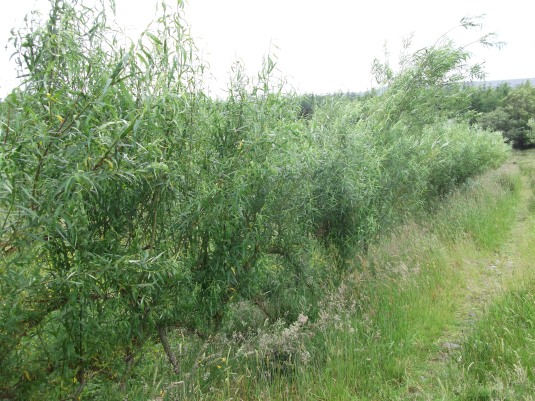
Willow is so easy and versatile to use, it almost makes the perfect planting material and my goodness, it grows so quickly! With every year it grows, the more rods it produces, providing ever more planting opportunities. We have literally fenced our whole land with willow, which is why when I said that we had planted lots of trees, it really is quite impossible to count but it must be getting towards 1000, possibly more, but hey, who’s counting?

The only problem with willow is that Bowie and  Floyd, our donkeys, love to eat it, so in many areas we have had to put an exclusion zone with a wire fence as well.

009

010

011

Wrapping the rods in this way holds them in place.

Willow really is so easy to use, you literally just push it into the ground, walk away and watch it grow. I would say that we have had around a 95% success rate with many sizes from 2 feet in length, pushed in to ground about 9 inches, to 12 feet that we wove into  archways ( hence our name!)

017

Fallen arches. The wind will always catch anything that’s top heavy. This archway is about 6 years old and our willowarchway picture.

002

This is it after a straighten up and a haircut !

004

Weaving not only looks pleasing but strengthens the structure.

005

007

This fedge is around 3 years old.020

This 100 metre long fedgerow is  6 years old and was the first fedge to be planted on our land. It goes from the house all the way down the driveway to the lane. This willow was originally sourced from the roadside and all other fedgerows on our land have been created from this  We have plans to lay another fedge on the other side of the driveway and in time we’ll join the two together to form a tunnel.

008

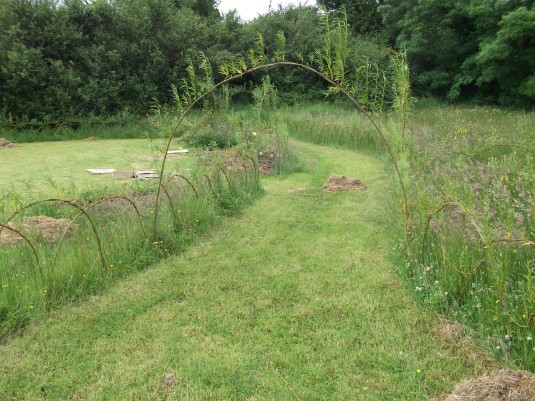
Willow fedgeing being used to create a pathway through the garden.

Happy fedgeing, any questions and you know where we are.

Enjoy

THERE’S MORE AT THE DOOR.

Hello and welcome to ‘The Willows’ and a big welcome to all our new Twitter followers.

Even though we have a very well insulated house with the floors, walls and roof all having 4 inches of insulation, there are always little problems with the wind through the side door especially when the wind blows from the east. All of the windows have insulation tape/draught excluder, so no draughts there, but the doors were difficult to sort out. Another problem was that all of our coats, boots, etc.  were hung up in the kitchen and when they got wet ( and knowing where we live, that’s often !), and were drying, it made the kitchen steam up and the floor wet meaning more heat was needed.

So, I solved this by building something so simple and easy, that has been used for exactly these reasons for hundreds of years, a porch.

020

It was built onto a raised floor to stop damp, and the window was recycled from an old property.

023

It was stained with a water based stain and then with linseed oil to waterproof it. The re cycled door and window are now ready for a lick of paint.

The difference it has made is amazing, no more draughts and all of our wet clothing hangs in there so no more dripping all over the kitchen floor, this has also given us more room in the kitchen and we’re not tripping up over boots !

024

I decided to put this old door in so that we can fetch fuel/wood for the range or start the generator from inside the porch without getting wet, especially once the tin roof has been extended!

Obviously the porch itself has a few draughts, but once the coats etc have stopped dripping, they can come in for a nice warm and a dry but they have to go back out there. There’s a place for everything and everything in it’s place, as my Grandma used to say . And I bet yours did too !

030

It would be virtually impossible to stop every draught but as long as they are only small I think they actually help with some ventilation.

So now the house needs less heating, less heating means less waste and so less of a carbon footprint, and so less money needed to be spent.

We would like to supply all of our own fuel here at ‘The Willows’, and we are trying as we have already planted lots of trees over the years,( too many to count,) and most of the willow has been woven into fedges ( I will post more about the fedges in a later blog). Each willow will produce hundreds of rods that can be mulched into briquettes for fuel. Some people say that willow isn’t good for the fire as it has a high water content, but we dried some out for a year and it burnt well, very well, but making a compact briquette makes it burn slower, but with a good heat.

So we’re off now to plant more trees that include Oak ,Beech, Birch, Alder and of course Willow for our Samhain celebration.

HAPPY SAMHAIN !

032

Enjoy.

ALL HANDS ON DECK.

Hello and welcome to all our new followers ( and of course our long time followers !), and thankyou for all the nice comments you have all sent. We do hope that you all find us helpful, informative and entertaining!

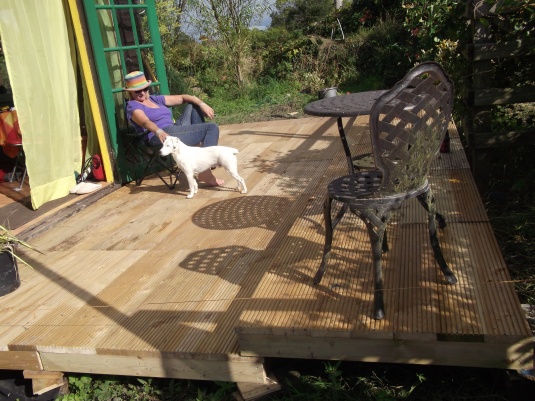
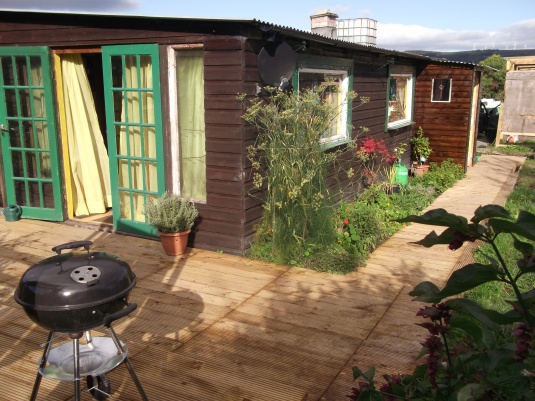
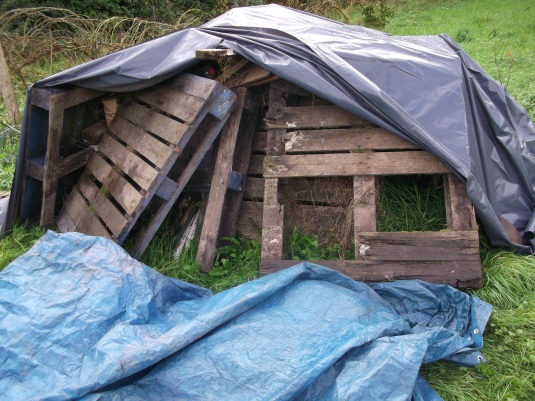
At the start of this project 7 years ago, the summer weather was absolutely fantastic. It was really hot and very sunny and we felt like we were on a permanent holiday! We had a 35 foot caravan and a dream, so we started to build the extension onto the side of the caravan. We were playing Spanish music on our little CD player and having fun together, it almost felt like we were making our own telly programme, we called it ‘House Builders In The Sun !’ One time I was making the roof and 2 Red Kites were swooping overhead, we took this to be a good omen. But as ever the weather changed ( we were still having fun !) but at the end of the day this was still just grazing land and with all the rain it started to get really boggy and just down right muddy. Ok we didn’t have any carpets to mess up ( we still don’t), but it all became hard work, slipping and sliding around the areas around the house, something had to be done to make things easier. So I decided to put wooden pallets down, that I recycled from a local business ( with their permission of course)  to make a decking and walkway, and it really did work, but as always there’s another but, after awhile they started to rot and break so we kept on replacing them but these also rotted and in the end we got fed up of trying to tip toe around the place to avoid the holes and broken ankles. So once again something had to be done, hence now our proper decking and walkway.

001

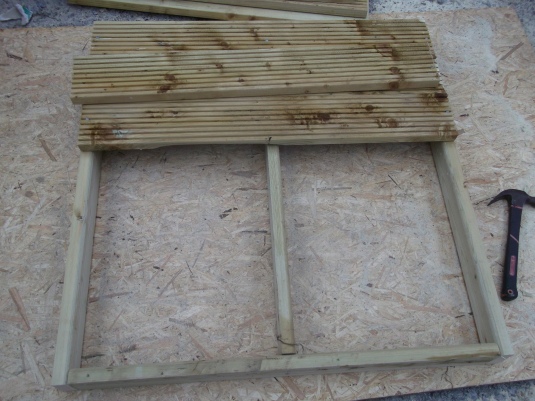
As you can see instead of just making a static decking, I built it all in 1 metre square sections.

002

Each section can be moved or changed at any time either because of damage, or knowing us, we just want to change the pattern. Because we can…… and probably will! Why move house when you can just change how it looks?

005

The last pallet being ripped up, thank goodness ! I had to use a spade,crow bar and sheer brute force !

007

The sections going down.

009

The walkway down the side of the house past the herb garden.

013

What a view. The decking’s not bad either !

027

The whole decking and walkway is now really nice to walk on without fear of slipping or breaking something ( like a pint glass !)

004

And in case you were wondering what happened to all the old faithful pallets, well they will make perfect bonfire material for our Samhain  festival, seeing as we’ve invited bigmunkeyman and his mates to hold his bigmunkeyman’s bigmonster movie mashup !

I’m sure he will have a tale to tell at www. bigmunkeyman.wordpress.com

By the way I’d like to say Happy 30th Birthday to my sister TIGGER !

DON’T ‘CHUCK BERRY’ AWAY

Well, here we are again, a new post and a new look and what better way to start anew than to talk about wine. What a year it’s been for winemaking as we had an abundance of produce. We do love our wine making as it’s creating something new that you can play around with. We started with Elderflower Champagne, something we’d never made before. It just takes 2 flower heads, sugar, yeast and 3 weeks! It starts out tasting like fizzy pop, but if you leave it for a few months then wow, it really does taste like champagne ! Because of the nature of champagne, you must put it in a fizzy water/pop bottle, as the gas has to be released very gently !

047

The bottle on the right is water, the misshapen one on the left is Champagne ! You have to gently release the gas or something will go pop !!

The next wine we made was an old favourite of ours, Dandelion. We still have some left from last year and the ratio of sugar to yeast may be wrong but oh well, we have a nice Sherry, and it blows your socks off !

We then went on to black and red currants and the reason for the title of this post is because if you don’t chuck your pulp away, you can get a second brewing from it. From 4 pounds of currants you can get 2 gallons of wine by adding 1 pound of raisins and boiling water to the second pulp. If anyone is interested in the full recipe just let us know.

We did exactly the same for the blackberries and the elderberries and with using the pulp twice we managed to brew 14 gallons of wine ! The sound of all the demi’s plop plopping in the kitchen was amazing, it’s a wonder the dogs got any sleep at all! We did after drinking some of last years brew!

044

People seem to think that you have to have a constant temperature to brew wine but no, not really. We have a range that goes out at night and the wine all slows down but once the range is re lit, it all starts up again, as long as there’s a temperature of around 15c it will still brew.

After a month or two, and if the ‘blups’ have slowed down, you can rack the wine off so it doesn’t sit on the ‘must’ as this can affect the taste, and then after about 6 months the wine can be bottled. We still have a few bottles of apple wine from 2 years ago and age does make it better. But it’s so hard to sit and wait for all of this good stuff to mature, so we came up with an idea. As grapes make wine, why can’t we use grape juice? So we added some sugar and yeast to a supermarket grape juice

037

We heated up the grape juice to dissolve the sugar and added the yeast once cooled.

041

Because we’d run out of demi’s we had to improvise by using 2 x 5 litre water bottles and drilling a hole in the lids and inserting a rubber grommet ( that I got from the motor factor’s) for the air locks to fit.

042

There’s no sediment to rack off and it’s ready in 4 weeks ! And it works, we’ve just enjoyed our first bottle and it’s as good as any inexpensive wine from the supermarket ! Wait until we try the tropical fruit one !!

This was just an experiment to see if it was possible, but that’s the sort of thing we do here at ‘The Willows’ we try, we experiment, we see what works. It’s the only way.

Anyway, happy brewing and let us know what you think.

Enjoy. ‘The Willows’

Previous Older Entries

May 2024
M T W T F S S
 12345
6789101112
13141516171819
20212223242526
2728293031  

Enter your email address to follow this blog and receive notifications of new posts by email.

Follow willowarchway on WordPress.com